非单文件组件
可以自行了解组件的概念。
组件主要是为了重复利用。

基本使用
总结:(感觉组件像类一样)
非单文件组件,一个文件中包含n个组件。
单文件组件,一个文件中只包含1个组件。
Vue中使用组件的三大步骤:
一、定义组件(创建组件)
二、注册组件
三、使用组件(写组件标签)
一、如何定义一个组件?
使用Vue.extend(options)创建,其中options和new Vue(options)时传入的那个options几乎一样,但也有点区别;
区别如下:
- el不要写,为什么? ——— 最终所有的组件都要经过一个vm的管理,由vm中的el决定服务哪个容器。
- data必须写成函数,为什么? ———— 避免组件被复用时,数据存在引用关系。
备注:使用template可以配置组件结构。
二、如何注册组件?
- 局部注册:靠new Vue的时候传入components选项
- 全局注册:靠Vue.component(‘组件名’,组件)
三、编写组件标签(使用组件):
<school></school>
1
2
3
4
5
6
7
8
9
10
11
12
13
14
15
16
17
18
19
20
21
22
23
24
25
26
27
28
29
30
31
32
33
34
35
36
37
38
39
40
41
42
43
44
45
46
47
48
49
50
51
52
53
54
55
56
57
58
59
60
61
62
63
64
65
66
67
68
69
70
71
72
73
74
75
76
77
78
79
80
81
82
83
84
85
86
87
88
89
90
91
92
93
94
95
96
97
98
99
100
101
102
103
104
105
106
107
108
109
110
111
112
113
114
115
| <!DOCTYPE html>
<html lang="en">
<head>
<meta charset="UTF-8" />
<meta http-equiv="X-UA-Compatible" content="IE=edge" />
<meta name="viewport" content="width=device-width, initial-scale=1.0" />
<title>基本使用</title>
<script type="text/javascript" src="../js/vue.js"></script>
</head>
<body>
<div id="root">
<h1>{{msg}}</h1>
<xuexiao></xuexiao>
<hr>
<student></student>
<hr>
<student></student>
<hr>
<hello></hello>
</div>
</body>
<script type="text/javascript">
Vue.config.productionTip = false
const school = Vue.extend({
template:`
<div>
<h2>学校姓名:{{schoolName}}</h2>
<h2>学校地址:{{address}}</h2>
</div>
`,
data () {
return {
schoolName:'a',
address:'重庆',
}
},
})
const student = Vue.extend({
template:`
<div>
<h2>学生姓名:{{studentName}}</h2>
<h2>学生年龄:{{age}}</h2>
</div>
`,
data() {
return {
studentName:'张三',
age:18,
}
},
})
const hello = Vue.extend({
template:`
<h2>你好啊{{name}}</h2>
`,
data () {
return {
name:'tom',
}
}
})
Vue.component('hello',hello)
new Vue({
el: '#root',
components:{
xuexiao:school,
student
},
data () {
return {
msg:'Vue实例中的数据的内容',
}
}
})
</script>
</html>
|
几个注意点
几个注意点:
1.关于组件名:
一个单词组成:
第一种写法(首字母小写):school
第二种写法(首字母大写):School
多个单词组成:
第一种写法(kebab-case命名):my-school
第二种写法(CamelCase命名):MySchool (需要Vue脚手架支持)
备注:
(1).组件名尽可能回避HTML中已有的元素名称,例如:h2、H2都不行。
(2).可以使用name配置项指定组件在开发者工具中呈现的名字。
2.关于组件标签:
第一种写法:<school></school>
第二种写法:<school/>
备注:不用使用脚手架时,会导致后续组件不能渲染。
3.一个简写方式:
const school = Vue.extend(options) 可简写为:const school = options 看起来就像直接定义一个对象和Vue无关,但是实际上是Vue帮助我们写成了标准形式
这里不演示了,因为以后都不写这个Vue.extend()了
1
2
3
4
5
6
7
8
9
10
11
12
13
14
15
16
17
18
19
20
21
22
23
24
25
26
27
28
29
30
31
32
33
34
35
36
37
38
39
40
41
42
43
44
45
46
47
48
49
50
| <!DOCTYPE html>
<html lang="en">
<head>
<meta charset="UTF-8" />
<meta http-equiv="X-UA-Compatible" content="IE=edge" />
<meta name="viewport" content="width=device-width, initial-scale=1.0" />
<title></title>
<script type="text/javascript" src="../js/vue.js"></script>
</head>
<body>
<div id="root">
<school></school>
<school/>
</div>
</body>
<script type="text/javascript">
Vue.config.productionTip = false
const school = Vue.extend({
name:'school',
template:`
<div>
<h2>学校姓名:{{schoolName}}</h2>
<h2>学校地址:{{address}}</h2>
</div>
`,
data () {
return {
schoolName:'a',
address:'重庆',
}
}
})
new Vue({
el: '#root',
components:{
}
})
</script>
</html>
|
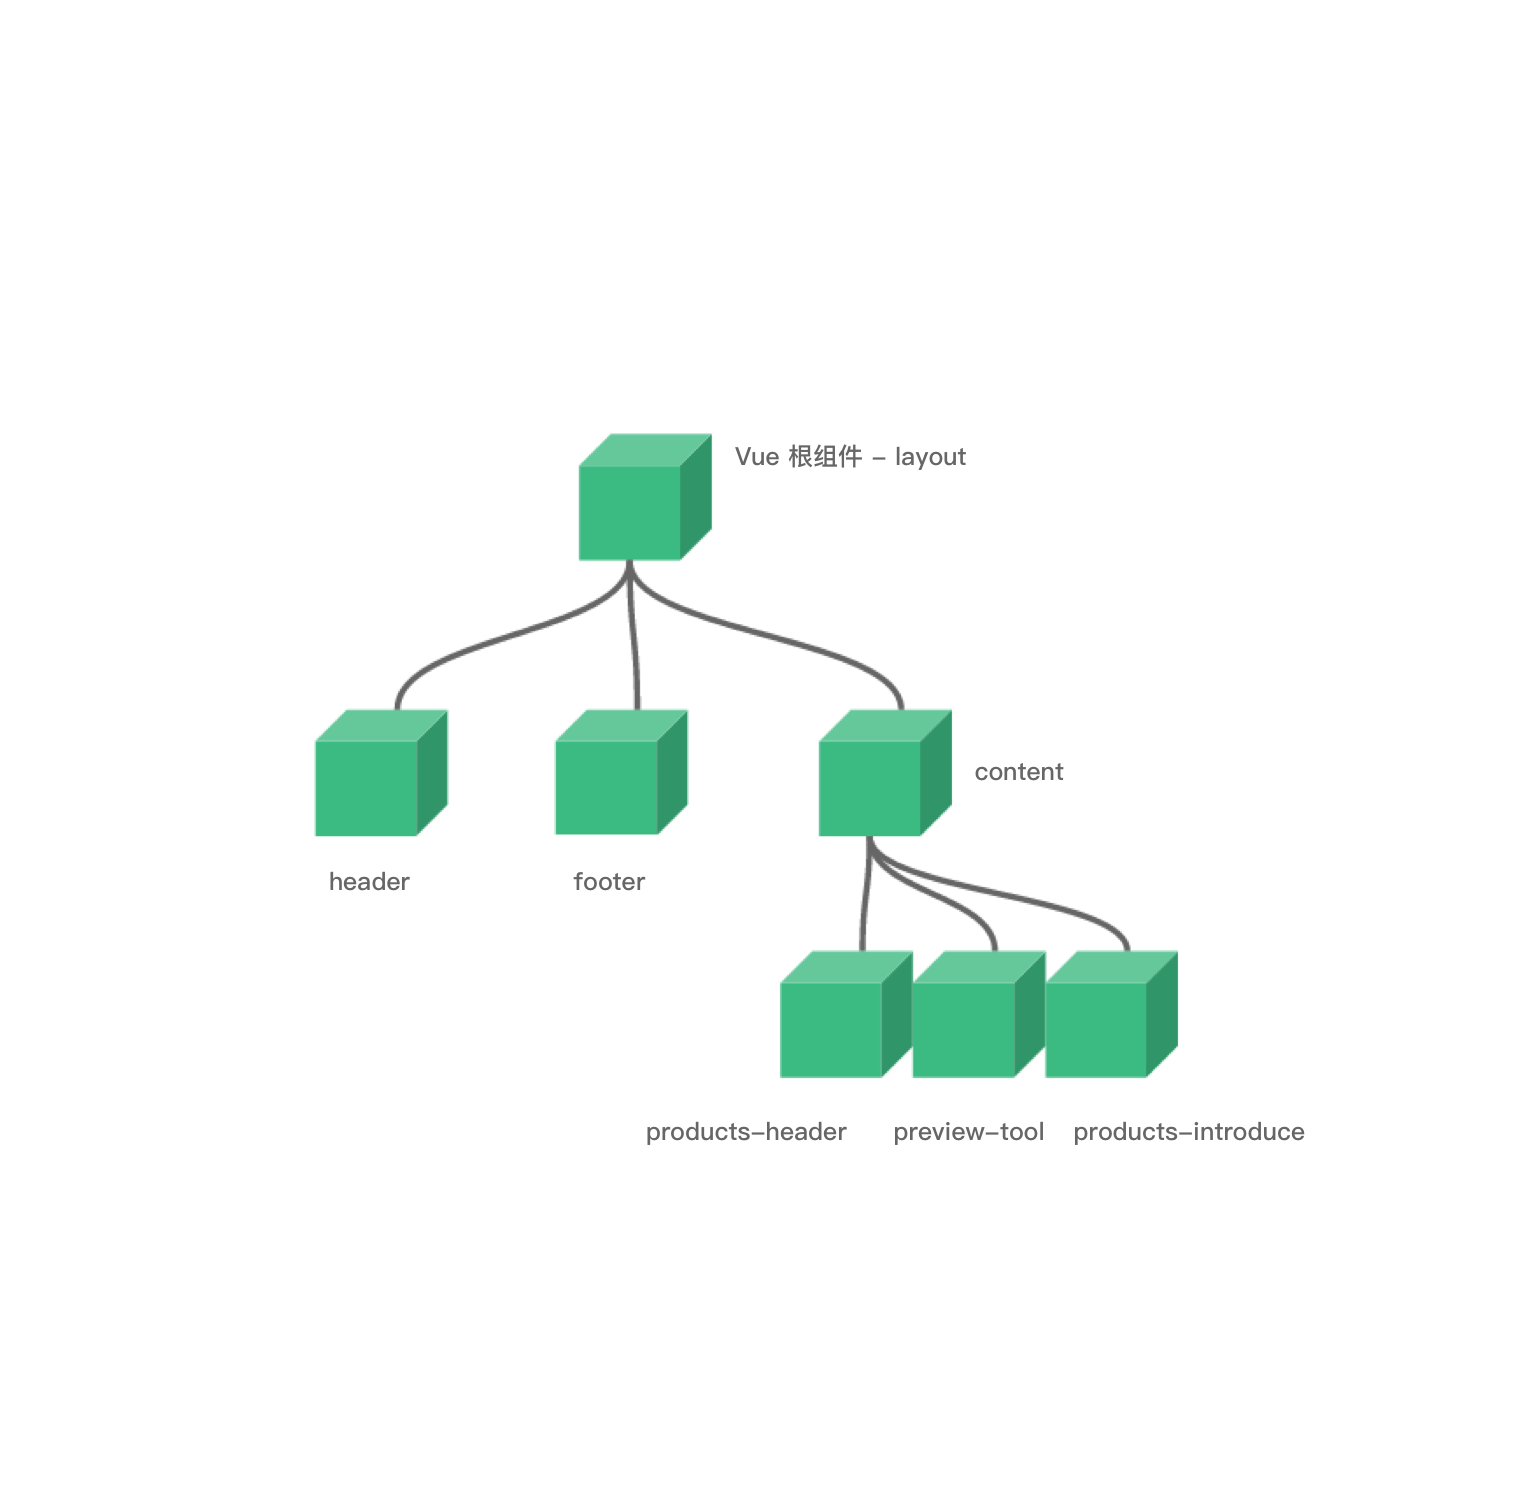
组件的嵌套
1
2
3
4
5
6
7
8
9
10
11
12
13
14
15
16
17
18
19
20
21
22
23
24
25
26
27
28
29
30
31
32
33
34
35
36
37
38
39
40
41
42
43
44
45
46
47
48
49
50
51
52
53
54
55
56
57
58
59
60
61
62
63
64
65
66
67
68
69
70
71
72
73
74
75
76
77
78
79
80
81
82
83
84
85
86
87
88
89
90
91
92
93
94
95
96
97
98
99
100
101
102
| <!DOCTYPE html>
<html lang="en">
<head>
<meta charset="UTF-8" />
<meta http-equiv="X-UA-Compatible" content="IE=edge" />
<meta name="viewport" content="width=device-width, initial-scale=1.0" />
<title>组件的嵌套</title>
<script type="text/javascript" src="../js/vue.js"></script>
</head>
<body>
<div id="root">
</div>
</body>
<script type="text/javascript">
Vue.config.productionTip = false
// 注意,被嵌套的组件要在大组件前定义,否则别人都找不到,就没法嵌套
// 定义student组件
const student = {
name: 'student',
template: `
<div>
<h2>学生姓名:{{studentName}}</h2>
<h2>学生年龄:{{age}}</h2>
</div>
`,
data() {
return {
studentName: '张三',
age: 18,
}
},
}
// 定义school组件
const school = {
name: 'school',
template: `
<div>
<h2>学校姓名:{{schoolName}}</h2>
<h2>学校地址:{{address}}</h2>
<student></student>
</div>
`,
data() {
return {
schoolName: 'a',
address: '重庆',
}
},
components: {
student,
},
}
// 定义hello组件
const hello = {
template:`<h2>{{msg}}</h2>`,
data () {
return {
msg:'hello'
}
}
}
// 定义app组件 开发规范,vm控制app组件,app组件控制其他组件,app组件相当于一人之下万人之上
const app = {
template:`
<div>
<hello></hello>
<school></school>
</div>
`,
components:{
school, // student 被 school管理了,不用写student
hello
}
}
// 注册组件
new Vue({
template:'<app></app>',
el: '#root',
components: {
app
},
})
</script>
</html>
|
VueComponent
关于VueComponent:
1.school组件本质是一个名为VueComponent的构造函数,且不是程序员定义的,是Vue.extend生成的。
2.我们只需要写<school/>或<school></school>,Vue解析时会帮我们创建school组件的实例对象,
即Vue帮我们执行的:new VueComponent(options)。
3.特别注意:每次调用Vue.extend,返回的都是一个全新的VueComponent!!!!
4.关于this指向:
(1).组件配置中:
data函数、methods中的函数、watch中的函数、computed中的函数 它们的this均是【VueComponent实例对象】。
(2).new Vue(options)配置中:
data函数、methods中的函数、watch中的函数、computed中的函数 它们的this均是【Vue实例对象】。
5.VueComponent的实例对象,以后简称vc(也可称之为:组件实例对象)。
Vue的实例对象,以后简称vm。
一个重要的内置关系
1
2
3
4
5
6
7
8
9
10
11
12
13
14
15
16
17
18
19
20
21
22
23
24
25
26
27
28
29
30
31
32
33
34
35
36
37
38
39
40
41
42
43
44
45
46
47
48
49
50
51
52
53
54
55
56
57
58
59
60
61
62
63
64
65
66
67
68
69
70
71
72
73
74
75
76
77
78
79
80
81
82
| <!DOCTYPE html>
<html lang="en">
<head>
<meta charset="UTF-8" />
<meta http-equiv="X-UA-Compatible" content="IE=edge" />
<meta name="viewport" content="width=device-width, initial-scale=1.0" />
<title>一个重要的内置关系</title>
<script type="text/javascript" src="../js/vue.js"></script>
</head>
<body>
<div id="root">
<school></school>
</div>
</body>
<script type="text/javascript">
Vue.config.productionTip = false
Vue.prototype.x = 99
const school = Vue.extend({
name:'school',
template:`
<div>
<h2>学校名称:{{name}}</h2>
<h2>学校地址:{{address}}</h2>
<button @click="showX">点我输出x</button>
</div>
`,
data(){
return {
name:'123',
address:'重庆'
}
},
methods: {
showX(){
console.log(this.x)
}
},
})
const vm = new Vue({
el:'#root',
data:{
msg:'你好'
},
components:{school}
})
</script>
</html>
|

 wechat
 alipay